Perform the procedure below to configue SSL on an Apache server.
-
Browse to the
conf folder which is created during the installation of Apache Server. In a typical installation, you can find the conf folder in the following location:
C:\Apache24\conf
-
Copy the
openssl file and paste it in the
bin folder. In a typical installation, you can find the bin folder in the following location:
C:\Apache24\bin.
-
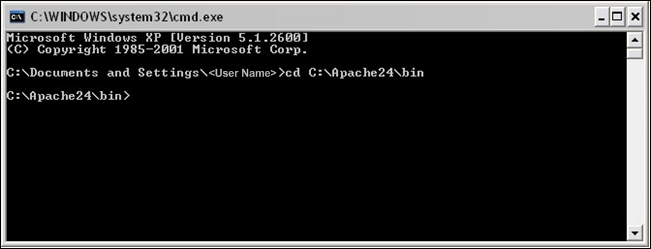
Open the Command Prompt and navigate to the Apache server home bin directory.
-
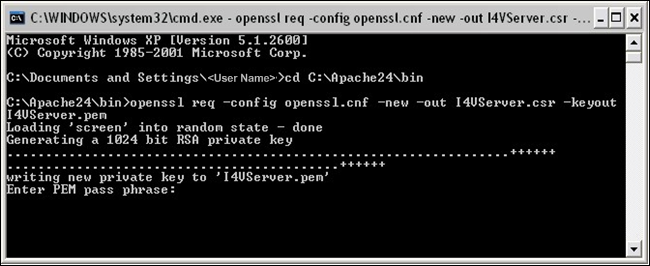
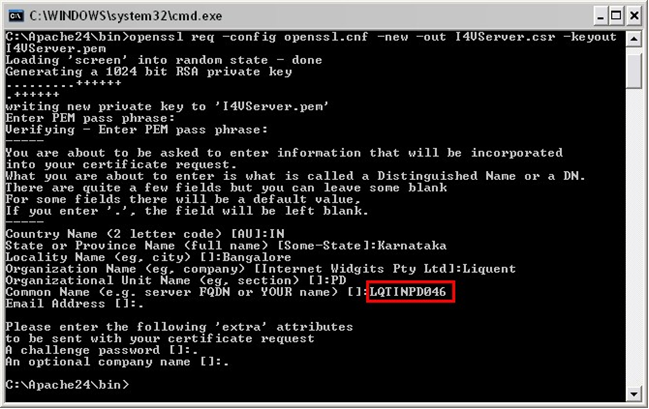
Type the following line as shown in the image below:
openssl req -config openssl.cnf -new –out I4VServer.csr -keyout I4VServer.pem
-
Enter the PEM pass phrase and Common Name while skipping the other prompts.
- PEM pass phrase: Make note/remember the password you enter. This password will be used for the private key (I4VServer.pem), which would be generated later.
- Common Name: The fully-qualified domain name for the certificate. In the following image, LQTINPD046 is used, which means that certificate must be used on https://LQTINPD046:8443/
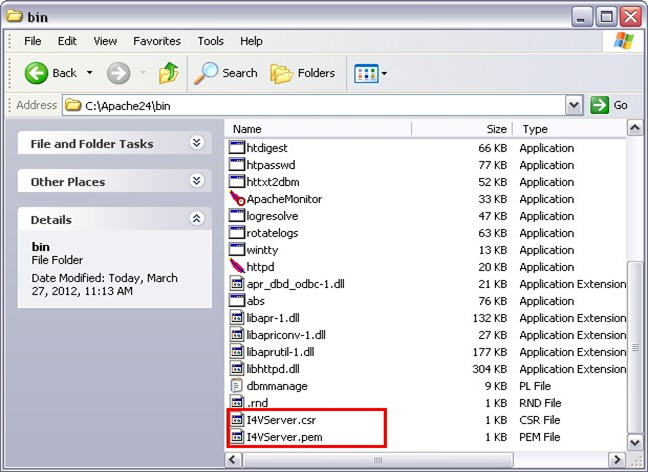
After the PEM pass phrase and Common Name are entered, the files
I4VServer.csr and
I4VServer.pem will be generated in the Apache server home bin directory (typically found in
C:\Apache24\bin).
-
Enter the following line in the command prompt:openssl rsa -in I4VServer.pem –out I4VServer.key
-
When prompted for the password, enter the password used for PEM pass phrase.
The file
I4VServer.key will be created in the Apache server home bin directory (typically found in
C:\Apache24\bin.
-
Enter the following line in the command prompt to create a
x.509 certificate:
openssl x509 –in I4VServer.csr -out I4VServer.cert -req -signkey I4VServer.key -days 365
The file
I4VServer.cert will be created in the Apache server home bin directory (typically found in
C:\Apache24\bin).
-
Browse to the bin folder found in the Apache server home directory (typically found in
C:\Apache24\bin) and open the file
httpd.conf using a Notepad or a text editor.
-
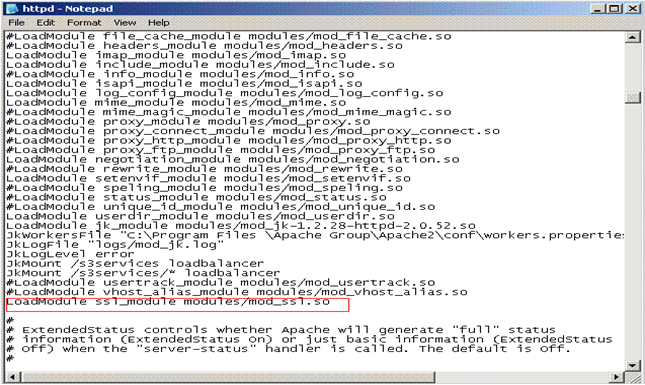
Uncomment the following line by removing # found at the beginning of the line. Refer to the following image:
LoadModule ssl_module modules/mod_ssl.so
-
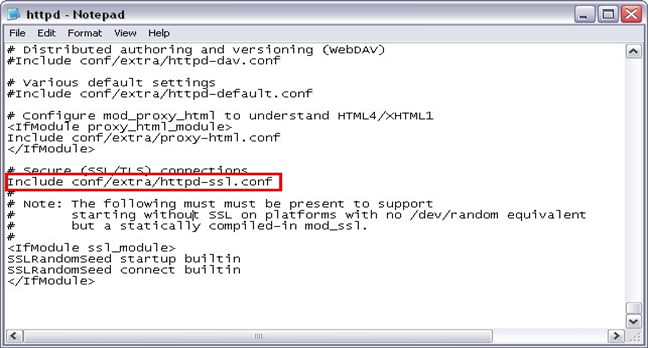
Uncomment the line by removing # found at the beginning of the line if it is commented. Refer to the following image:
Include conf/extra/httpd-ssl.conf
-
Save and close the file.
-
Create a folder under
conf folder and name it is as ssl so that it looks like
C:\Apache24\conf\ssl
-
Copy the files
I4VServer.key and
I4VServer.cert files found in the
bin folder (typically found in
C:\Apache24\bin) and paste them in the
ssl folder that was created in the previous step.
-
Rename the file
I4VServer.cert to
I4VServer.crt.
-
Browse to the extra folder found in the Apache server home directory (typically found in
C:\Apache24\conf\extra) and open the file
httpd-ssl.conf using Notepad or a text editor.
-
Delete the lines including and between
<IfDefine SSL> and
</IfDefine>.
-
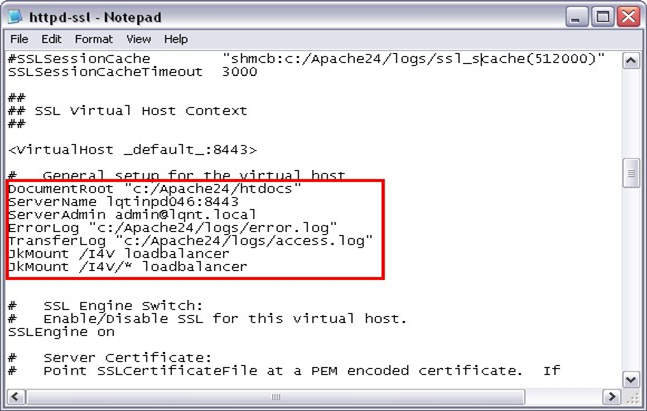
Provide details for
DocumentRoot,
ServerName, and
ServerAdmin as required. Refer to the following image:
-
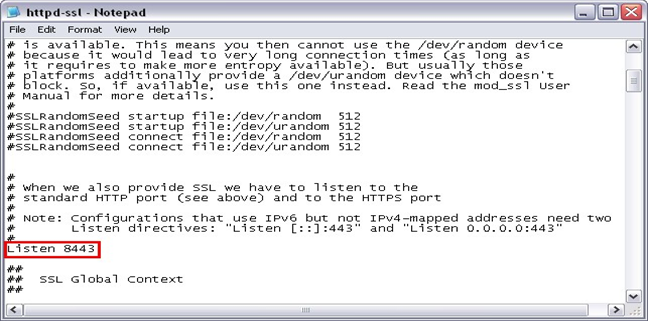
Enter
8443 as the port number. Refer to the following image:
-
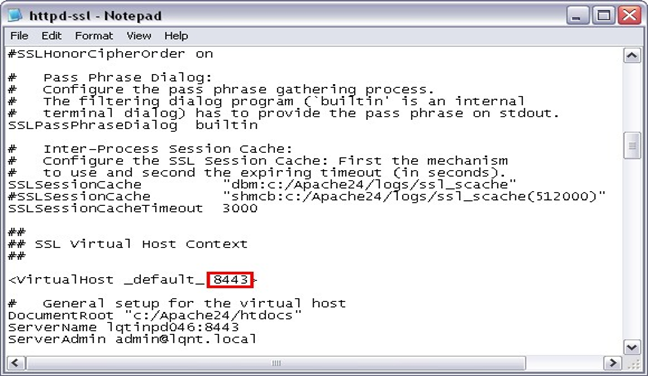
Edit the port number for
VirtualHost _default_:443 to
VirtualHost _default_:8443
-
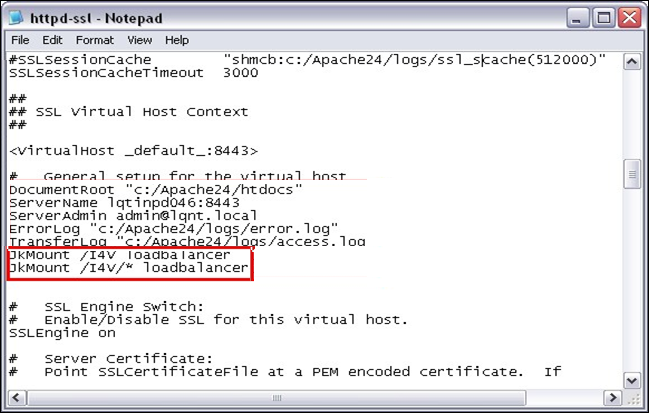
Add the following lines under
<VirtualHost _default_:8443>. Refer to the following image:
JkMount /I4V loadbalancer
JkMount /I4V/* load balancer
-
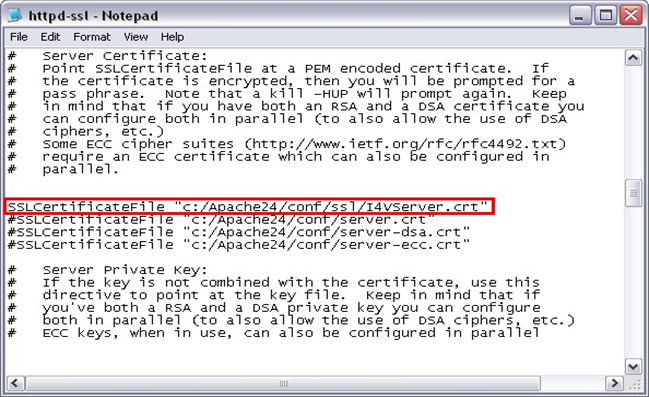
Uncomment the following line by removing
# found at the beginning of the line. Refer to the following image.
SSLCertificateFile "c:/Apache24/conf/ssl/I4VServer.crt"
-
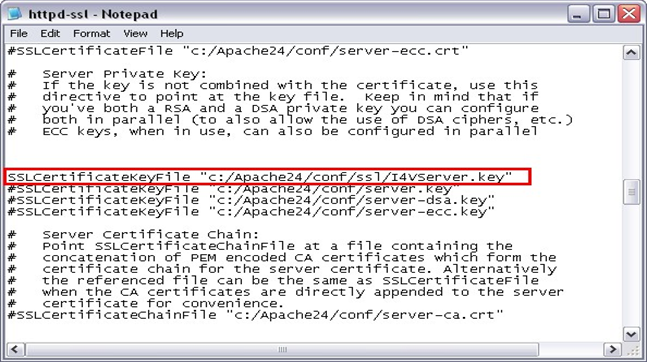
Uncomment the following line by removing
# found at the beginning of the line. Refer to the following image.
SSLCertificateKeyFile "c:/Apache24/conf/ssl/I4VServer.key"
-
Save and close the file.
-
Start Internet Explorer, go to
.
-
Click
.
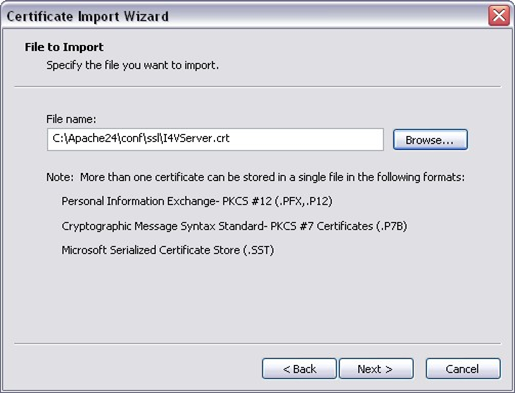
The Certificate Import Wizard appears.
-
Click
Next
-
Using the
Browse button, select the
I4VServer.crt file. Refer to the following image:
-
Click
Next.
-
Select the option
Automatically select the certificate store based on the type of certificate and click
Next.
-
Click
Finish.
-
In the
Security Warning message that appears, click
Yes and click
OK in the subsequent message window.
-
Open the Tomcat instance Server.xml file using Notepad or a text editor.
-
Provide the name of the Tomcat instance for the attribute
jvmRoute as shown in the following line.
<Engine name="Catalina" defaultHost="localhost" jvmRoute="TomcatA">
-
For each Tomcat instance you have, add the following lines and provide the Tomcat instance name value for the
jvmRoute attribute:
<Engine name="Catalina" defaultHost="localhost" jvmRoute="TomcatA">
<Engine name="Catalina" defaultHost="localhost" jvmRoute="TomcatB">
<Engine name="Catalina" defaultHost="localhost" jvmRoute="TomcatC">
<Engine name="Catalina" defaultHost="localhost" jvmRoute="TomcatD">
-
Save and close the file.
-
Open a new txt file and add the following lines:
# Start setup file
# workers.tomcat_home=C:\\Program Files\\Apache Group\\TomcatA
workers.java_home=$JAVA_HOME
ps=\\
worker.list=TomcatA ,loadbalancer
worker.TomcatA.port=8009 worker.TomcatA.host=LQTINPD046 worker.TomcatA.type=ajp13 worker.TomcatA.lbfactor=1
worker.loadbalancer.type=lb worker.loadbalancer.balanced_workers=TomcatA worker.loadbalancer.sticky_session=false
-
Make change as required for each attribute such as the port, host, type, etc.
-
Add the above lines for each instance of the Tomcat you have. Refer to the example below.
# Start setup file
#
workers.tomcat_home=C:\\Program Files\\Apache Group\\TomcatB
workers.java_home=$JAVA_HOME
ps=\\
worker.list=TomcatB ,loadbalancer
worker.TomcatB.port=xxxx worker.TomcatB.host=xxxxxxxx worker.TomcatB.type=xxxx worker.TomcatB.lbfactor=x
worker.loadbalancer.type=lb worker.loadbalancer.balanced_workers=TomcatB worker.loadbalancer.sticky_session=false
# Start setup file
#
workers.tomcat_home=C:\\Program Files\\Apache Group\\TomcatC workers.java_home=$JAVA_HOME
ps=\\
worker.list=TomcatC ,loadbalancer
worker.TomcatC.port=xxxx worker.TomcatC.host=xxxxxxxx worker.TomcatC.type=xxxx worker.TomcatC.lbfactor=x
worker.loadbalancer.type=lb worker.loadbalancer.balanced_workers=TomcatC
worker.loadbalancer.sticky_session=false
-
Make change as required for each attribute such as the port, host, type, etc.
-
Save the file with the name workers and with the extension properties such that the file is known as
workers.properties. Save the file in the
conf folder which is typically found in
C:\Program Files\Apache Group\Apache2\conf\.
-
Open the
httpd.conf file and add the following lines.
LoadModule jk_module modules/mod_jk-1.2.30-httpd-2.0.53.so
JkWorkersFile “C:\Apache24\conf\workers.properties"
-
Save and close the file.
Note: As Apache Server is running in HTTPS mode, there is no need to configure all Tomcat instances in HTTPS mode.
-
Restart the Apache and Tomcat instances.